
How Much Does It Cost to Recaulk a Bathtub?
I’m a professional handyman serving Milton and the surrounding GTA, and bathtub recaulking is one of those small jobs I’ve done repeatedly as part of bathroom maintenance and repair work. I’ve worked on everything from straightforward tub-and-tile joints in newer homes to older bathrooms where the existing caulk is cracked, mouldy, separating, or hiding moisture problems underneath.
I’ve probably recaulked well over 100 bathtubs and shower/tub surrounds over the years. The actual bead of caulk is the easy part. What experience really teaches you is how important the preparation is. Removing every bit of failing caulk, cleaning and drying the joint properly, checking for movement or moisture issues, and applying the right bathroom-grade sealant correctly. That’s where the real work lives.
Most articles on this topic will tell you a bathtub recaulk costs “$100 to $300” and move on. That range is technically correct, but it doesn’t tell you why the range exists, what a fair price looks like in the GTA, or how to tell whether you’re getting a job that will last or one that will fail in six months. That’s what I want to cover.
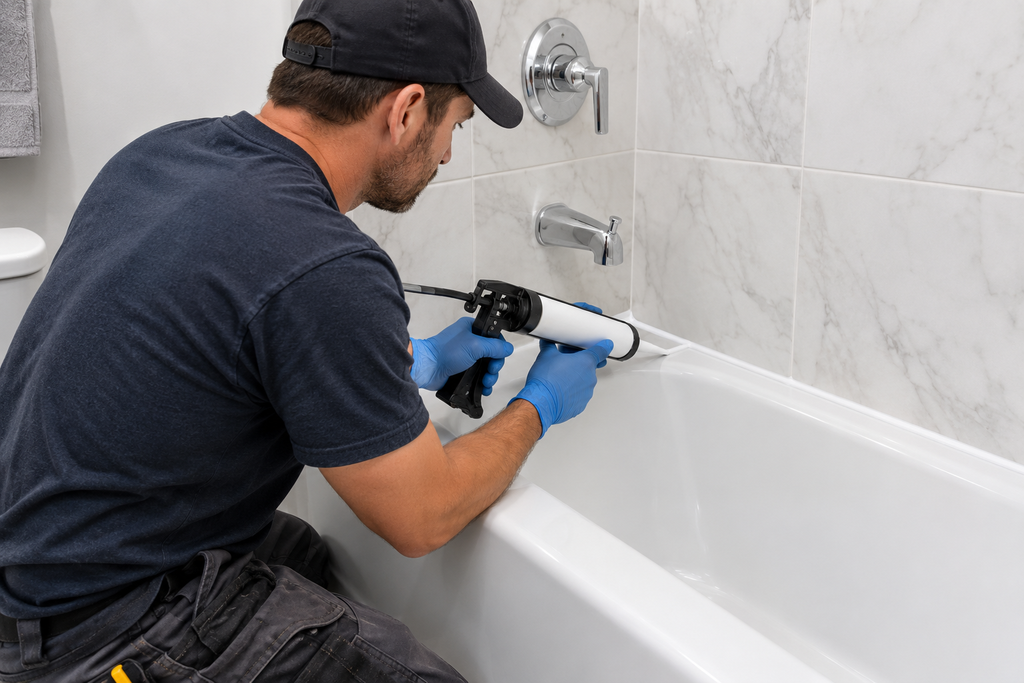
How Much Does It Actually Cost in the GTA?
I price bathtub recaulking as a flat-rate job rather than charging by the linear foot. Measuring every inch of caulk doesn’t really reflect the work involved. The time is in removing the old sealant, cleaning the joint, preparing the surfaces, letting everything dry properly, and applying a clean, continuous bead.
A Standard Job
For a straightforward tub-to-tile or tub-to-wall joint in decent condition, I’d typically expect a Milton or GTA homeowner to pay roughly $150 to $250 for a professional recaulk. That assumes there’s no significant water damage, extensive mould remediation, difficult access, or major repair work hiding underneath the old caulk.
If I’m already doing other bathroom work at the same visit, the effective price can be lower because the travel and setup time are shared.
The Low End
I’ve done small recaulk jobs for around $100 to $125, usually when the job was particularly quick, the access was easy, and I was already nearby for another service call. I wouldn’t use that as a universal price because a contractor still has travel, setup, cleanup, and material costs even when the actual caulking takes less than an hour.
The High End
I’ve had jobs reach $400 to $500 or more, but those weren’t simply “put new caulk around the tub” jobs. The price goes up when:
- The old silicone is stubborn and layered
- The joint needs extensive cleaning
- There’s mould or deteriorated material to deal with
- Multiple areas need to be recaulked
- There are signs of movement, moisture intrusion, or damage that need attention before new caulk can be installed
My rule of thumb is that the size of the bead isn’t what determines the price. The condition of what’s underneath it does. If someone gives you a very cheap quote without looking at the existing caulk and surrounding tile or tub, I’d ask exactly what preparation and removal work is included. That’s where the difference between a quick cosmetic job and a recaulk that actually lasts usually shows up.
A Job That Changed How I Explain Pricing
One job that really stuck with me was a bathtub in an older Milton home where, at first glance, the caulk actually looked pretty good. The homeowner expected a simple recaulk. Remove the old bead, put down fresh bathroom silicone, and be done in an afternoon.
Once I started removing the old caulk, I found multiple layers of silicone underneath. Someone had clearly been adding new caulk over the old stuff whenever it started to crack or separate. Underneath those layers, the joint was damp and there was dark staining along part of the tub-to-tile connection.
I stopped rather than simply covering it back up. After removing the remaining silicone and cleaning the joint, it became clear that water had been getting into the joint for some time. The homeowner hadn’t noticed because the surface bead still looked reasonably intact.
The original job was expected to be a straightforward $150 to $200 recaulk. Instead, I had to spend considerably more time removing the old material, drying and cleaning the joint, checking the surrounding area for obvious signs of damage, and making sure the surfaces were actually suitable for new sealant. The final cost was closer to $350, because the preparation and additional work took substantially longer than the homeowner expected.
The important lesson wasn’t that every old bathtub has hidden water damage. It doesn’t. It was that new caulk should never be treated as a way to seal over a problem you haven’t inspected. If the joint is damp, soft, stained, moving, or has several old layers of silicone, I want to understand why before putting a fresh bead over it.
That job also changed how I explain pricing to homeowners. When someone asks why a recaulk costs more than the tube of silicone at the hardware store, I point out that the material is the inexpensive part. The lasting result comes from what happens before the new caulk ever touches the tub.
Should You Do It Yourself?
I’m actually in favour of homeowners doing a straightforward bathtub recaulk themselves if they’re comfortable with careful prep and taking their time. It’s one of those jobs where you can save a decent amount of money, and you don’t need a huge collection of specialized tools.
The problem is that it looks much easier than it really is.
Common DIY Mistakes I See
The most common mistakes I find when a homeowner has tried it on their own:
- Not removing all of the old caulk
- Applying new silicone over damp or dirty surfaces
- Using the wrong type of caulk
- Making the bead too thick
- Trying to tool the silicone after it has already started skinning over
- Rushing the cure time and using the shower before the new sealant has properly cured
I also see homeowners focus heavily on making the new bead look smooth while ignoring what’s underneath. If the old silicone is still stuck to the tile or tub, or there’s moisture trapped behind it, a beautiful new bead isn’t going to solve the underlying problem.
When DIY Makes Sense
For a normal tub with sound tile, a solid tub edge, no signs of leaking, and one straightforward joint, I’d honestly say try it yourself if you’re patient and reasonably handy. Buy good-quality bathroom silicone, spend most of your time on removal and cleaning, and don’t rush the final application.
When to Call a Professional
My threshold for calling a pro is when the job stops being just caulking. If you find any of the following, I’d stop and have someone investigate:
- Soft drywall or substrate
- Persistent moisture
- Unexplained staining
- A loose or cracked tub
- Damaged grout
- Significant mould
- A suspected leak
- Several layers of failed silicone
- A tub that moves noticeably when someone gets in it
That last one matters because a moving tub can cause a new bead to fail no matter how perfectly you apply it.
My blunt advice: if you’re replacing caulk because it’s ugly, DIY can make sense. If you’re replacing it because it’s repeatedly failing or you suspect water is getting behind the tub, don’t just put another bead over it. Find out why it’s failing first. That’s the point where spending money on a professional can save you from turning a $150 maintenance job into a much bigger bathroom repair.
How to Evaluate a Contractor for This Job
The Number One Red Flag
The biggest red flag for me is a contractor who gives you a firm price without asking about the condition of the existing caulk or looking at the tub and surrounding area. A bathtub recaulk isn’t difficult because of the silicone itself. The unknown is what’s underneath the existing bead. If someone gives you a price based solely on the number of feet of caulk, without asking whether it’s peeling, mouldy, layered, cracked, or sitting against damaged surfaces, I’d at least ask what their price includes.
I’d also be cautious if the quote simply says “remove and replace caulking” without explaining the preparation. I want removal of the old sealant, cleaning, drying, surface preparation, application of the new bathroom-grade sealant, and cleanup to be clearly understood. Otherwise, two contractors can quote completely different scopes while appearing to offer the same service.
What a Good Quote Looks Like
A good pro doesn’t necessarily need a complicated estimate for a simple recaulk. But they should be able to explain what they’re going to do and what could change the price. Before I start, I’d want the homeowner to know whether the quote includes:
- Complete removal of the existing caulk
- Cleaning and preparation of the joint
- Checking for obvious moisture or substrate problems
- New bathroom-grade silicone or sealant
- Proper tooling and finishing of the bead
- Cleanup and disposal of the old material
- Any additional repair work that would require a separate charge
If I discover something unexpected after removing the old caulk, I wouldn’t simply continue and surprise the homeowner with a bigger bill afterward. I’d explain what I found, show them the problem where possible, explain why it matters, and get approval before expanding the scope.
That’s what I think homeowners should look for. Not necessarily the cheapest quote, but a clear scope with no mystery about what they’re actually paying for.
What I Wish Every Homeowner Understood
The biggest thing I’d want homeowners to know is that caulk isn’t supposed to be a permanent repair. It’s a flexible seal, and eventually it needs maintenance or replacement. Bathrooms move, tubs flex slightly under weight, temperature and humidity change, and sealant eventually deteriorates. A recaulk is maintenance, not a one-time fix.
I also tell people not to judge a recaulk by how good it looks on the first day. A perfectly smooth white bead can still fail quickly if the old silicone wasn’t completely removed or the surface wasn’t clean and dry.
And here’s a very practical tip: don’t schedule a bathtub recaulk right before you need to use the bathroom. Good silicone needs adequate curing time, and that means leaving the tub or shower alone for the period specified by the product. Rushing that final step can undo all the careful preparation that came before it.
A good recaulk is one of those jobs where 80% of the result is determined before the new silicone is applied. If a contractor spends more time removing, cleaning, and preparing than you expected, that’s not necessarily a sign they’re taking too long. It’s often the part that determines whether you’re doing the job again six months from now.