
How Much Does Professional Weather Stripping Installation Cost
If you’re feeling a draft around your exterior doors or windows, weather stripping is often the first fix that comes to mind. But before you call a handyman—or head to the hardware store—you probably want to know: how much does professional weather stripping installation actually cost in Ontario?
As a Milton-based handyman who’s repaired hundreds of drafty doors and windows across Halton and Peel, I’ve seen everything from simple seal replacements to full door realignments disguised as “weather-stripping jobs.” In this post, I’ll break down real-world pricing, share a case study from my own work, explain which materials hold up in Ontario’s climate, and help you decide when it’s time to call a pro versus tackling it yourself.
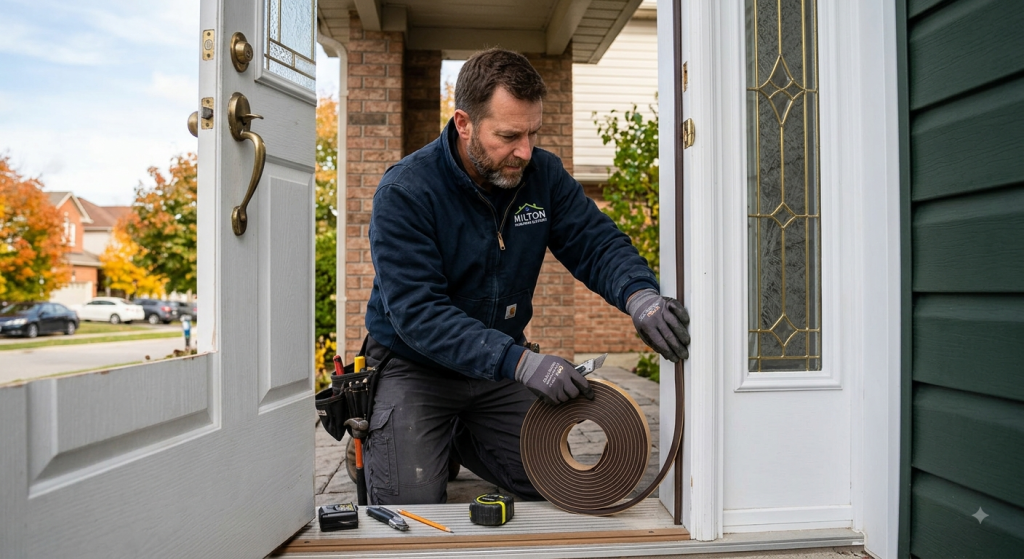
Typical Weather Stripping Installation Costs in Milton and Ontario
From my experience working in Milton and surrounding areas, I price weather stripping as a flat project or per-door/per-window rate—not strictly by linear foot. Homeowners are really paying for the inspection, removal of old material, proper fitting, installation, and testing—not just the number of feet of weather stripping used.
Exterior Door Weather Stripping Pricing
For a typical exterior door in Milton, I generally charge between $125–$250 CAD for a straightforward professional installation. This includes removing the old seal, cleaning the channel, installing a quality compression-style seal, and testing the door for proper operation.
More involved doors can easily run $250–$400+. These are jobs where I’m dealing with:
- Damaged or warped door stops
- Uneven or out-of-square frames
- Worn thresholds that need adjustment or replacement
- Multiple layers of failed caulking or old weather stripping
- Doors that aren’t closing or latching properly due to hinge sag or frame shift
Window Weather Stripping Pricing
For windows, pricing depends heavily on the type, age, and accessibility. A straightforward weather-stripping job on a standard window might be $75–$150 per window. Larger, older, or difficult-to-access windows—especially those with custom profiles or hard-to-reach tracks—can cost more.
What Pushes a Job Toward the Higher or Lower End?
Jobs tend to fall on the lower end of the price range when:
- The existing weather stripping comes off easily
- The door or window frame is in good condition
- It’s a standard-size door or window
- The replacement material is readily available
- There’s no need to repair the frame or threshold
- The homeowner has several similar doors or windows that can be done efficiently in the same visit
On the higher end, I’m looking at factors like:
- Old or damaged frames that need repair
- Badly worn thresholds
- Unusual door or window sizes
- Difficult access (e.g., second-story windows, tight spaces)
- Multiple layers of failed caulking or weather stripping
- Doors that aren’t closing or latching properly
One thing I always tell Milton homeowners: weather stripping isn’t supposed to compensate for a badly adjusted door. If I can see daylight around the door because the hinges have sagged or the frame has shifted, I’ll address that first. Otherwise, the new weather stripping may get crushed in one spot and barely contact the door in another.
Real-World Case Study: Fixing a Drafty Back Door in Milton
A good example from my Milton work was an exterior back door that the homeowner complained was noticeably drafty during the winter. They had already replaced the weather stripping themselves, but the problem kept coming back.
When I inspected it, the weather stripping wasn’t really the main problem. The door had dropped slightly over time, and the frame wasn’t making even contact with the seal. There was also a worn threshold that wasn’t sealing properly. You could actually feel cold air coming through along the lower corner of the door.
Here’s what I did:
- Adjusted the hinges to get the door sitting properly in the frame
- Removed the old weather stripping
- Installed a better-quality compression-style seal around the door frame
- Replaced the worn section around the bottom
- Adjusted the threshold so the door made consistent contact without becoming difficult to close
The total job came to roughly $275 CAD, including materials and labour. It took a little longer than a simple weather-stripping replacement because I was correcting the door alignment rather than just covering up the symptom.
The homeowner noticed the difference almost immediately. The cold draft around the lower corner was gone, the door closed more smoothly, and they said the room near the back entrance felt noticeably more comfortable. They also mentioned that the door seemed quieter because there was no longer a loose seal allowing outside noise and air to come through.
That’s a good example of why I don’t automatically recommend simply buying new weather stripping whenever someone tells me they have a draft. Sometimes the weather stripping has failed; other times the door or window has moved, settled, or become misaligned. If you don’t diagnose that first, you can spend money on new material and still have the same problem a few weeks later.
Best Weather Stripping Materials for Ontario’s Climate
From my experience as a Milton handyman, I don’t believe there is one “best” weather-stripping material for every door or window. Ontario’s temperature swings, freezing winters, summer heat, moisture, and the constant opening and closing of exterior doors all put different demands on the material. I choose the product based on the opening and the problem I’m actually trying to solve.
Materials I Commonly Use and Recommend
For exterior doors, I most commonly use:
- Rubber or silicone-style compression seals
- Bulb seals
- Quality vinyl weather stripping
Compression and bulb seals are particularly useful because they remain flexible and create a good seal when the door closes without requiring excessive pressure.
For the bottom of exterior doors, I’ll often use a proper door sweep combined with a threshold seal. If there’s a noticeable gap underneath the door, replacing the weather stripping around the sides won’t solve the whole problem. I want the bottom seal to make consistent contact while still allowing the door to open and close normally.
For windows, the material depends heavily on the window style and what is already installed. Foam, vinyl, rubber, and silicone-based products can all have their place. I generally prefer a quality material that remains flexible through Ontario’s cold weather rather than the cheapest adhesive foam I can find.
I’m not necessarily brand-loyal. I’ll use reputable products from manufacturers and suppliers I trust, but the correct profile and size are more important than simply buying the most expensive brand. A premium weather strip installed incorrectly is still going to perform poorly.
Materials I Warn Homeowners About
One thing I specifically warn homeowners about is the very thin, inexpensive peel-and-stick foam weather stripping sold in some big-box stores. It can be perfectly reasonable for a temporary fix or certain interior applications, but I wouldn’t automatically use it on a heavily used exterior door and expect it to last for years. The adhesive can deteriorate, the foam can compress permanently, and extreme temperature changes can expose weaknesses.
I also don’t recommend installing weather stripping that is too thick or too stiff just because it appears to create a better seal. I’ve seen homeowners put so much material around a door that they have to slam it to get the latch to engage. That’s not a successful installation.
My general rule is simple: the seal should stop air and water infiltration while allowing the door or window to operate normally. In Milton and across Ontario, I would rather use a good-quality flexible seal that is correctly sized and installed than an expensive product that is the wrong profile for the opening.
When to DIY Weather Stripping vs. Call a Professional
From my experience as a Milton handyman, I’m actually a big believer in homeowners doing simple weather-stripping jobs themselves when the situation is straightforward. If you have a relatively new exterior door, the frame is square, the existing seal is obviously worn out, and you can identify the correct replacement, it’s a reasonable DIY project.
Where I tell homeowners to stop and call a handyman is when the weather stripping isn’t actually the problem.
Warning Signs You Should Call a Pro
Some of the warning signs I look for are:
- You can see daylight around the door even after replacing the seal. That usually tells me the door, frame, threshold, or alignment needs attention.
- The door has to be slammed to close. Installing thicker weather stripping can make this even worse.
- The door doesn’t latch properly. This can indicate hinge movement, a shifted frame, or another alignment issue.
- The door is visibly sagging or rubbing against the frame. I’d fix the underlying alignment before installing new weather stripping.
- There’s water coming in around the opening. That’s more serious than a simple draft and may involve flashing, exterior caulking, the threshold, or water intrusion around the frame.
- The frame or surrounding wood is soft, swollen, or damaged. New weather stripping isn’t going to repair deteriorated material.
- You’ve already replaced the weather stripping once or twice and the draft keeps coming back. That’s a big clue that something else is causing the problem.
- It’s an older or unusual window/door system. Finding the correct seal profile can be more difficult than homeowners expect, and using the wrong material can create operating problems.
One of the most common DIY mistakes I see is buying a thicker seal because they assume thicker means better. It doesn’t. If the seal puts too much pressure on the door, the homeowner can end up with a door that doesn’t close properly, a latch that won’t engage, or weather stripping that gets permanently compressed.
I also recommend calling a professional if the homeowner suspects hidden water damage or significant air leakage around the actual frame. At that point, you’re no longer really doing a weather-stripping job; you’re diagnosing a building-envelope or door-installation problem.
My rule of thumb is simple: if the door or window itself operates perfectly and the seal is clearly worn, DIY is usually reasonable. If the opening doesn’t operate properly, or you’ve tried replacing the seal and the problem remains, call a handyman.
Spending a little money on diagnosis can be much cheaper than buying three different types of weather stripping and still having the same draft when you’re finished.
My #1 Pro Tip for Ontario Homeowners
My biggest pro tip for Ontario homeowners is: don’t buy the weather stripping until you’ve figured out exactly where the air is getting in.
I see homeowners all the time who feel a draft around a door, go to the hardware store, buy the thickest or most expensive weather stripping they can find, and install it everywhere. Sometimes it works, but quite often they’re treating the symptom rather than the cause.
Before replacing anything, close the door or window and check the entire perimeter. On a sunny day, you can sometimes see daylight around the frame, and on a cold or windy day you can often feel exactly where the air is coming through. Pay particular attention to the corners and the bottom of exterior doors.
Then check how the door or window operates. It should close and latch normally before you install the new seal. If the door is sagging, rubbing, difficult to close, or leaving an uneven gap, fix that problem first.
I also recommend homeowners take a small piece of the existing weather stripping with them when buying replacement material. There are many different profiles, and something that looks similar on the shelf may not fit the track or provide the right amount of compression.
And if you’re hiring someone, my advice is to ask them what they found was causing the draft before they recommend replacing the weather stripping. A good handyman should be able to explain whether the problem is the seal itself, door alignment, the threshold, the frame, or something else.
The money-saving lesson is simple: don’t confuse replacing weather stripping with fixing a draft. Diagnose the draft first. That one step can prevent buying the wrong material, doing the job twice, or paying for a weather-stripping replacement when the real problem is a poorly aligned door or damaged frame.
Ready to Fix Your Drafty Doors and Windows in Milton?
If you’re in Milton, Mississauga, Oakville, or surrounding areas and you’re tired of drafts, high heating bills, or doors that don’t close properly, I’m happy to take a look. I’ll diagnose the real issue, give you a clear flat-price quote, and make sure the job is done right the first time.
Because at the end of the day, weather stripping isn’t just about comfort—it’s about keeping your home energy-efficient, quiet, and protected from Ontario’s harsh weather. And that’s worth doing properly.